How to Generate a Token
In this section, we will see how OAuth is used to generate a token.
Authorization menu (account UI)
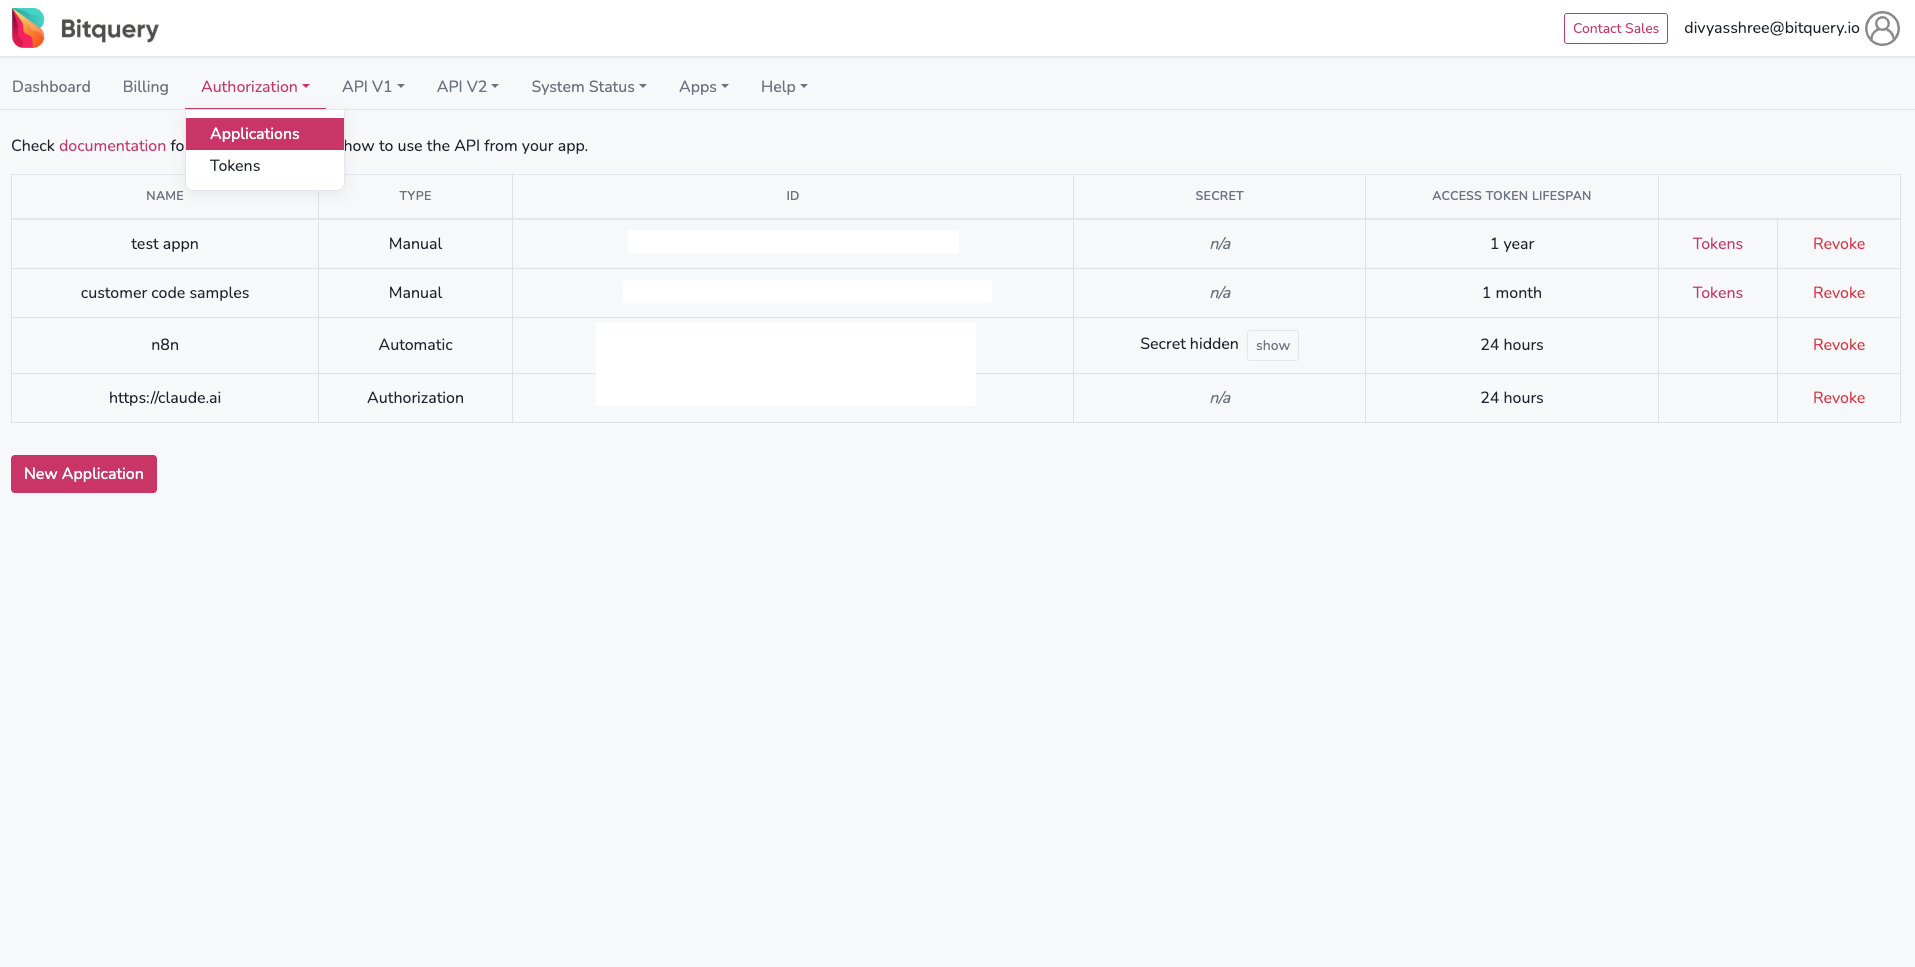
Sign in at account.bitquery.io. In the top navigation bar, open Authorization. It is a dropdown with two entries:
- Applications — list of your apps, token lifespan per app, Tokens / Revoke actions in each row, and + New Application to create one.
- Tokens — generate and copy access tokens for a chosen application.
The page below shows Authorization with Applications selected (active tab). A short doc link appears above the table; use + New Application to add an app.
Direct links (same pages as the menu items): Applications · Access tokens.
The first step is to create an application:
-
Create an Application: Open Authorization → Applications (or go to the Applications page) and click + New Application. Enter a name for your application and select an expiration time for the access tokens. Confirm creation.
-
Generate Access Token: We provide two methods to generate a token:
- You can generate a token for your application with a set expiration time.
- Or you can use your client ID-secret from your application to make a POST request to https://oauth2.bitquery.io/oauth2/token and get a token programmatically.
Example:
curl -X POST "https://oauth2.bitquery.io/oauth2/token" \
  -H "Content-Type: application/x-www-form-urlencoded" \
  --data-urlencode "grant_type=client_credentials" \
  --data-urlencode "client_id=YOUR_CLIENT_ID" \
  --data-urlencode "client_secret=YOUR_CLIENT_SECRET" \
  --data-urlencode "scope=api"
Sample response:
{"access_token":"<your_access_token>","expires_in":17999,"scope":"api","token_type":"bearer"}
If you have no applications created, the
Bearertoken changes every 12 hours. If the token is invalid, you get "Unauthorized" message.
Generating a Token with Set Expiration Time
-
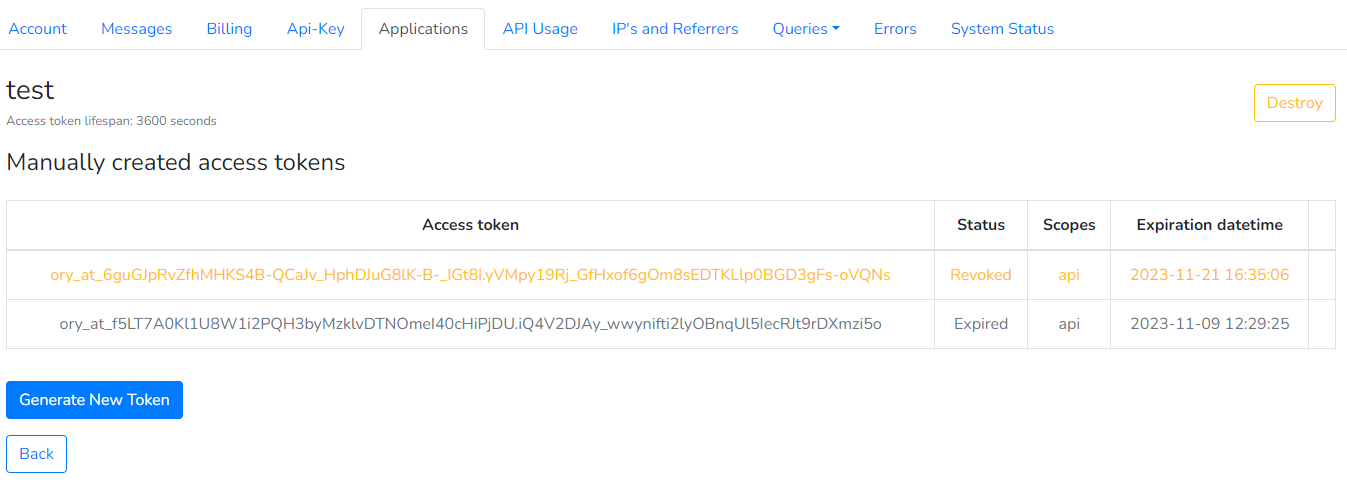
Open Authorization → Applications and click Tokens on the row for your application (or use Authorization → Tokens / the Access tokens page and choose the application). You will land on that app’s token page (URL like
/user/api_v2/applications/<id>), which lists Manually created access tokens, the access token lifespan, and actions for each token.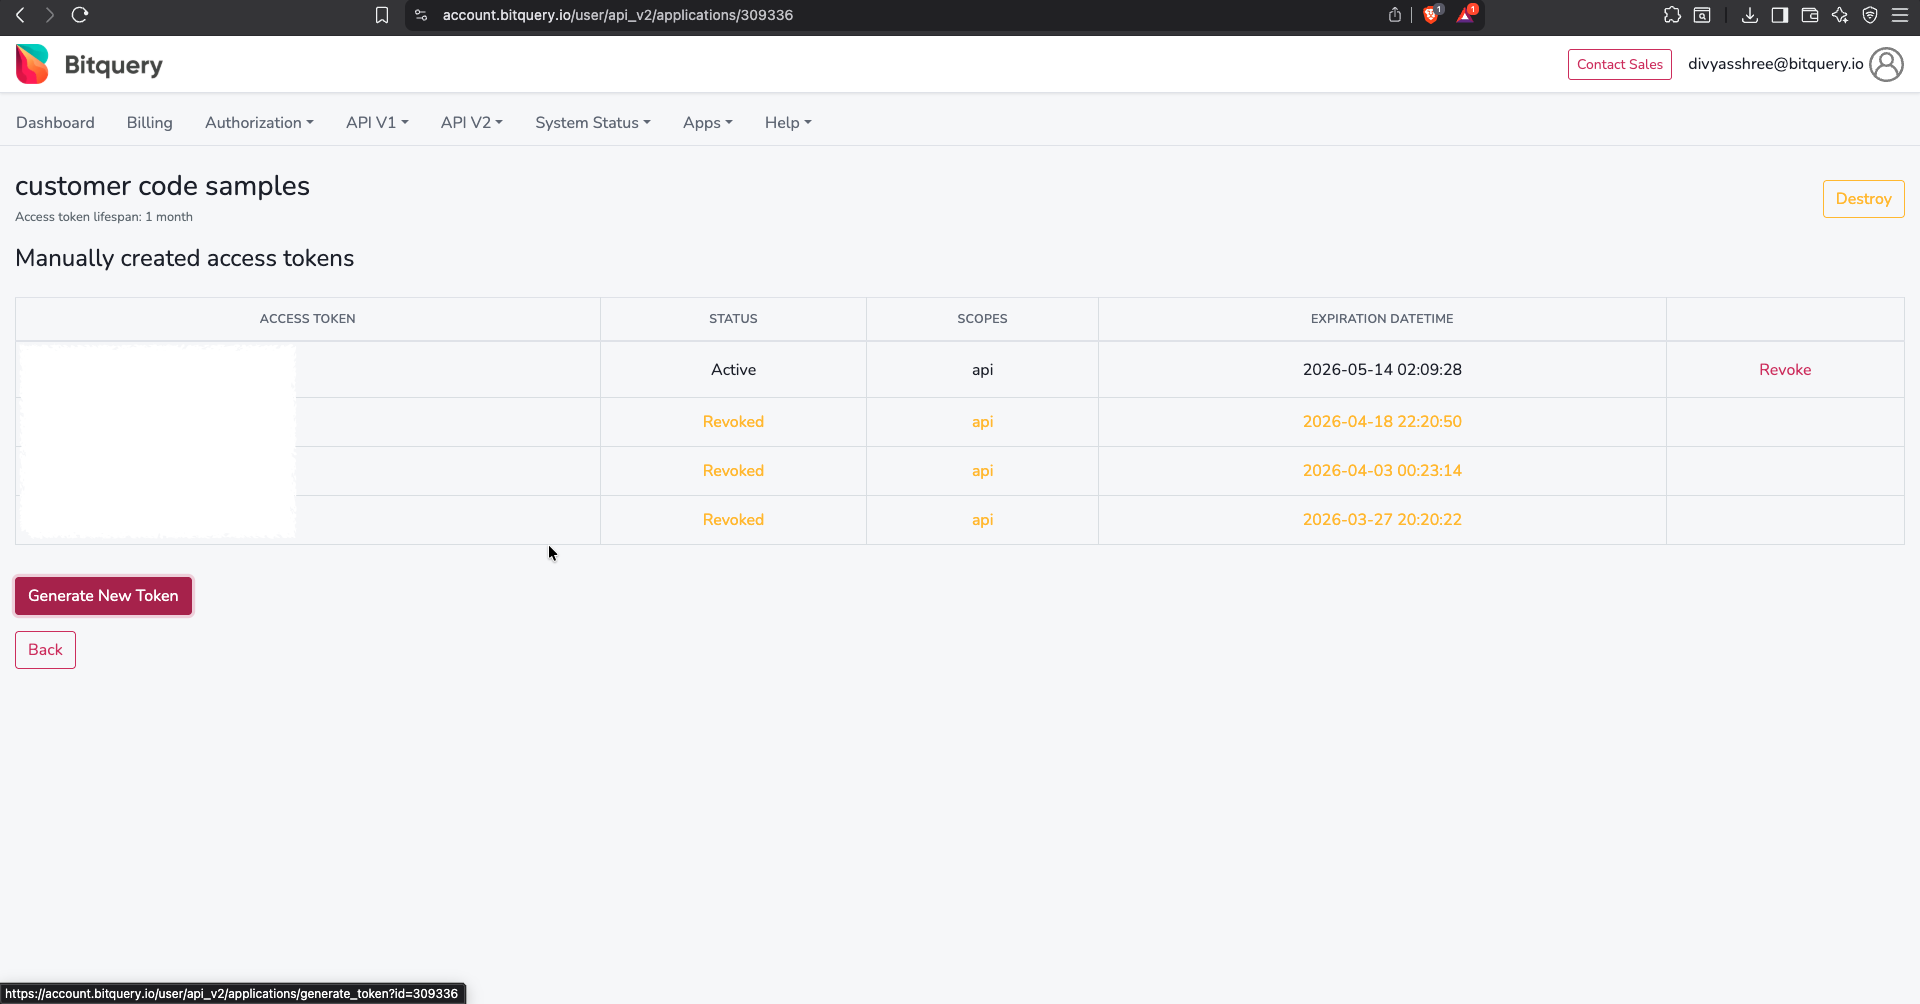
-
Click Generate New Token (or Generate Access Token, depending on the UI label).
-
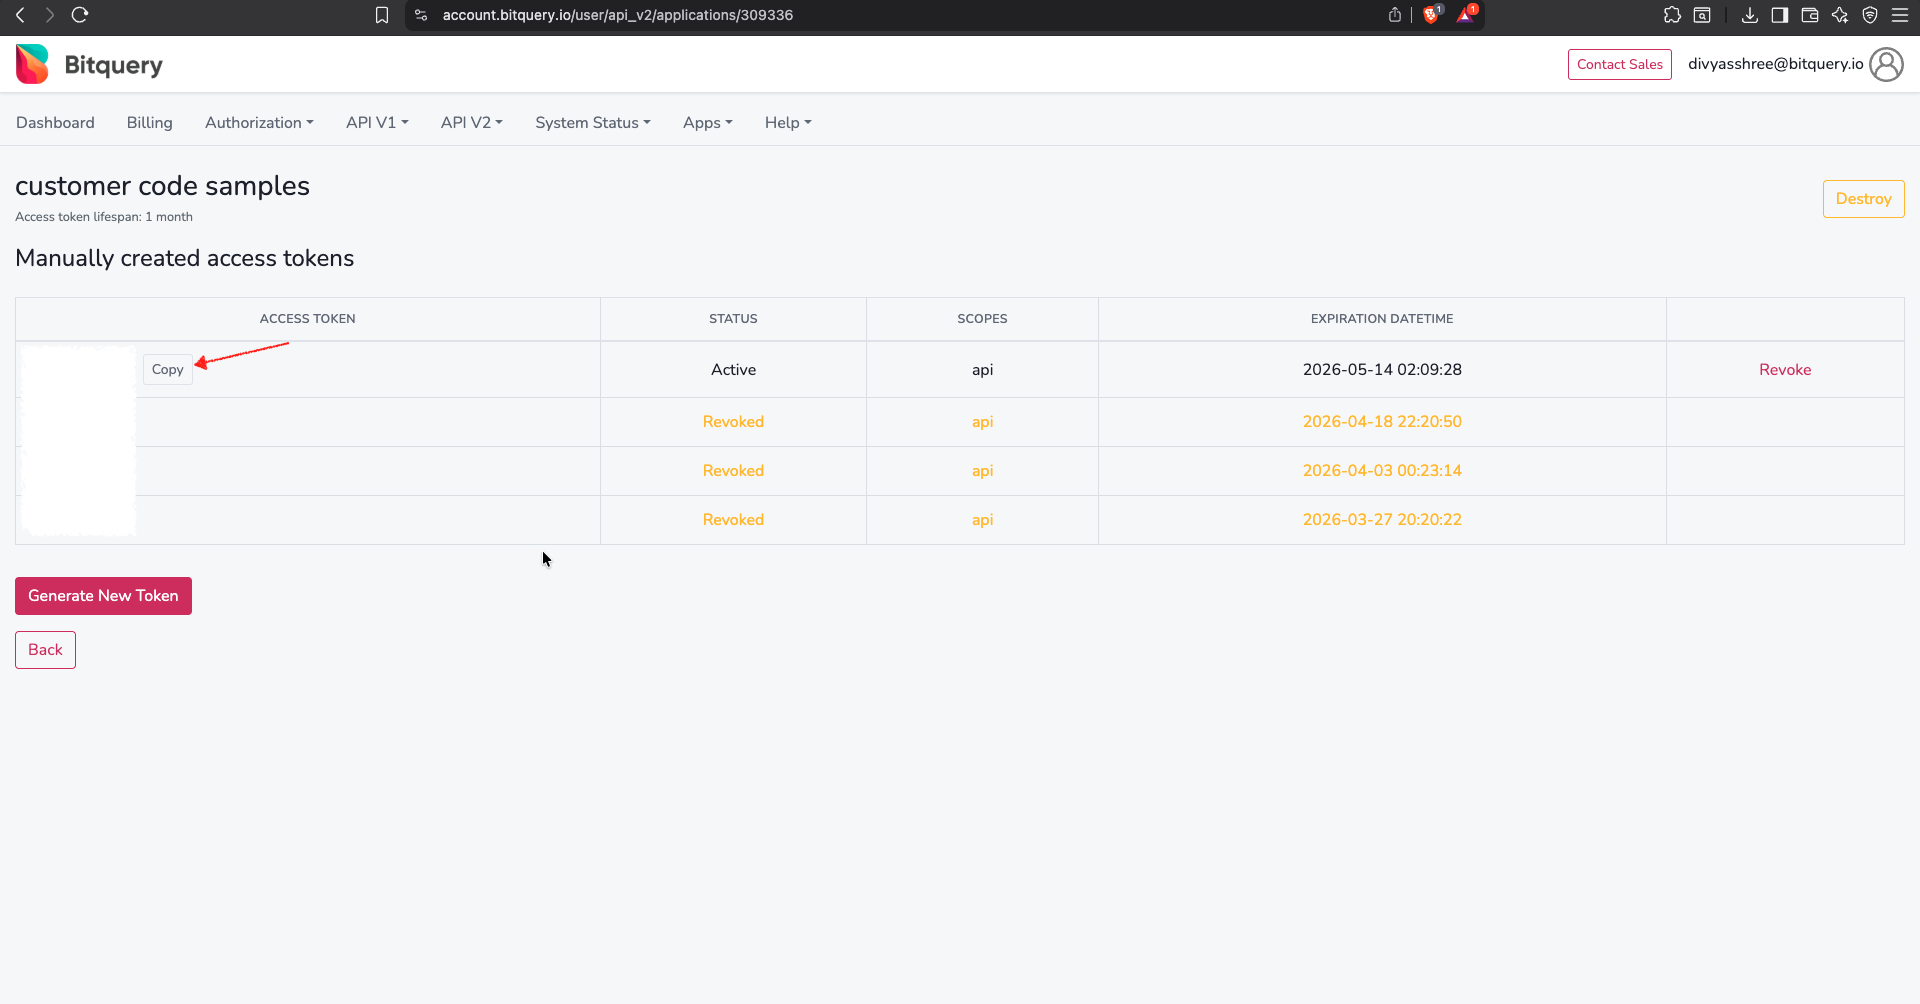
For the new Active token, click Copy next to the token value (or copy the value safely another way) and store it in a secure location.
Using the token:
To utilize the token you've copied from the api_v2/access_tokens page, use the code generation feature on your IDE to obtain the code in your preferred programming language. However, remember to paste the token you've copied from the api_v2/access_tokens page. This is necessary because the IDE code generator only displays temporary tokens.
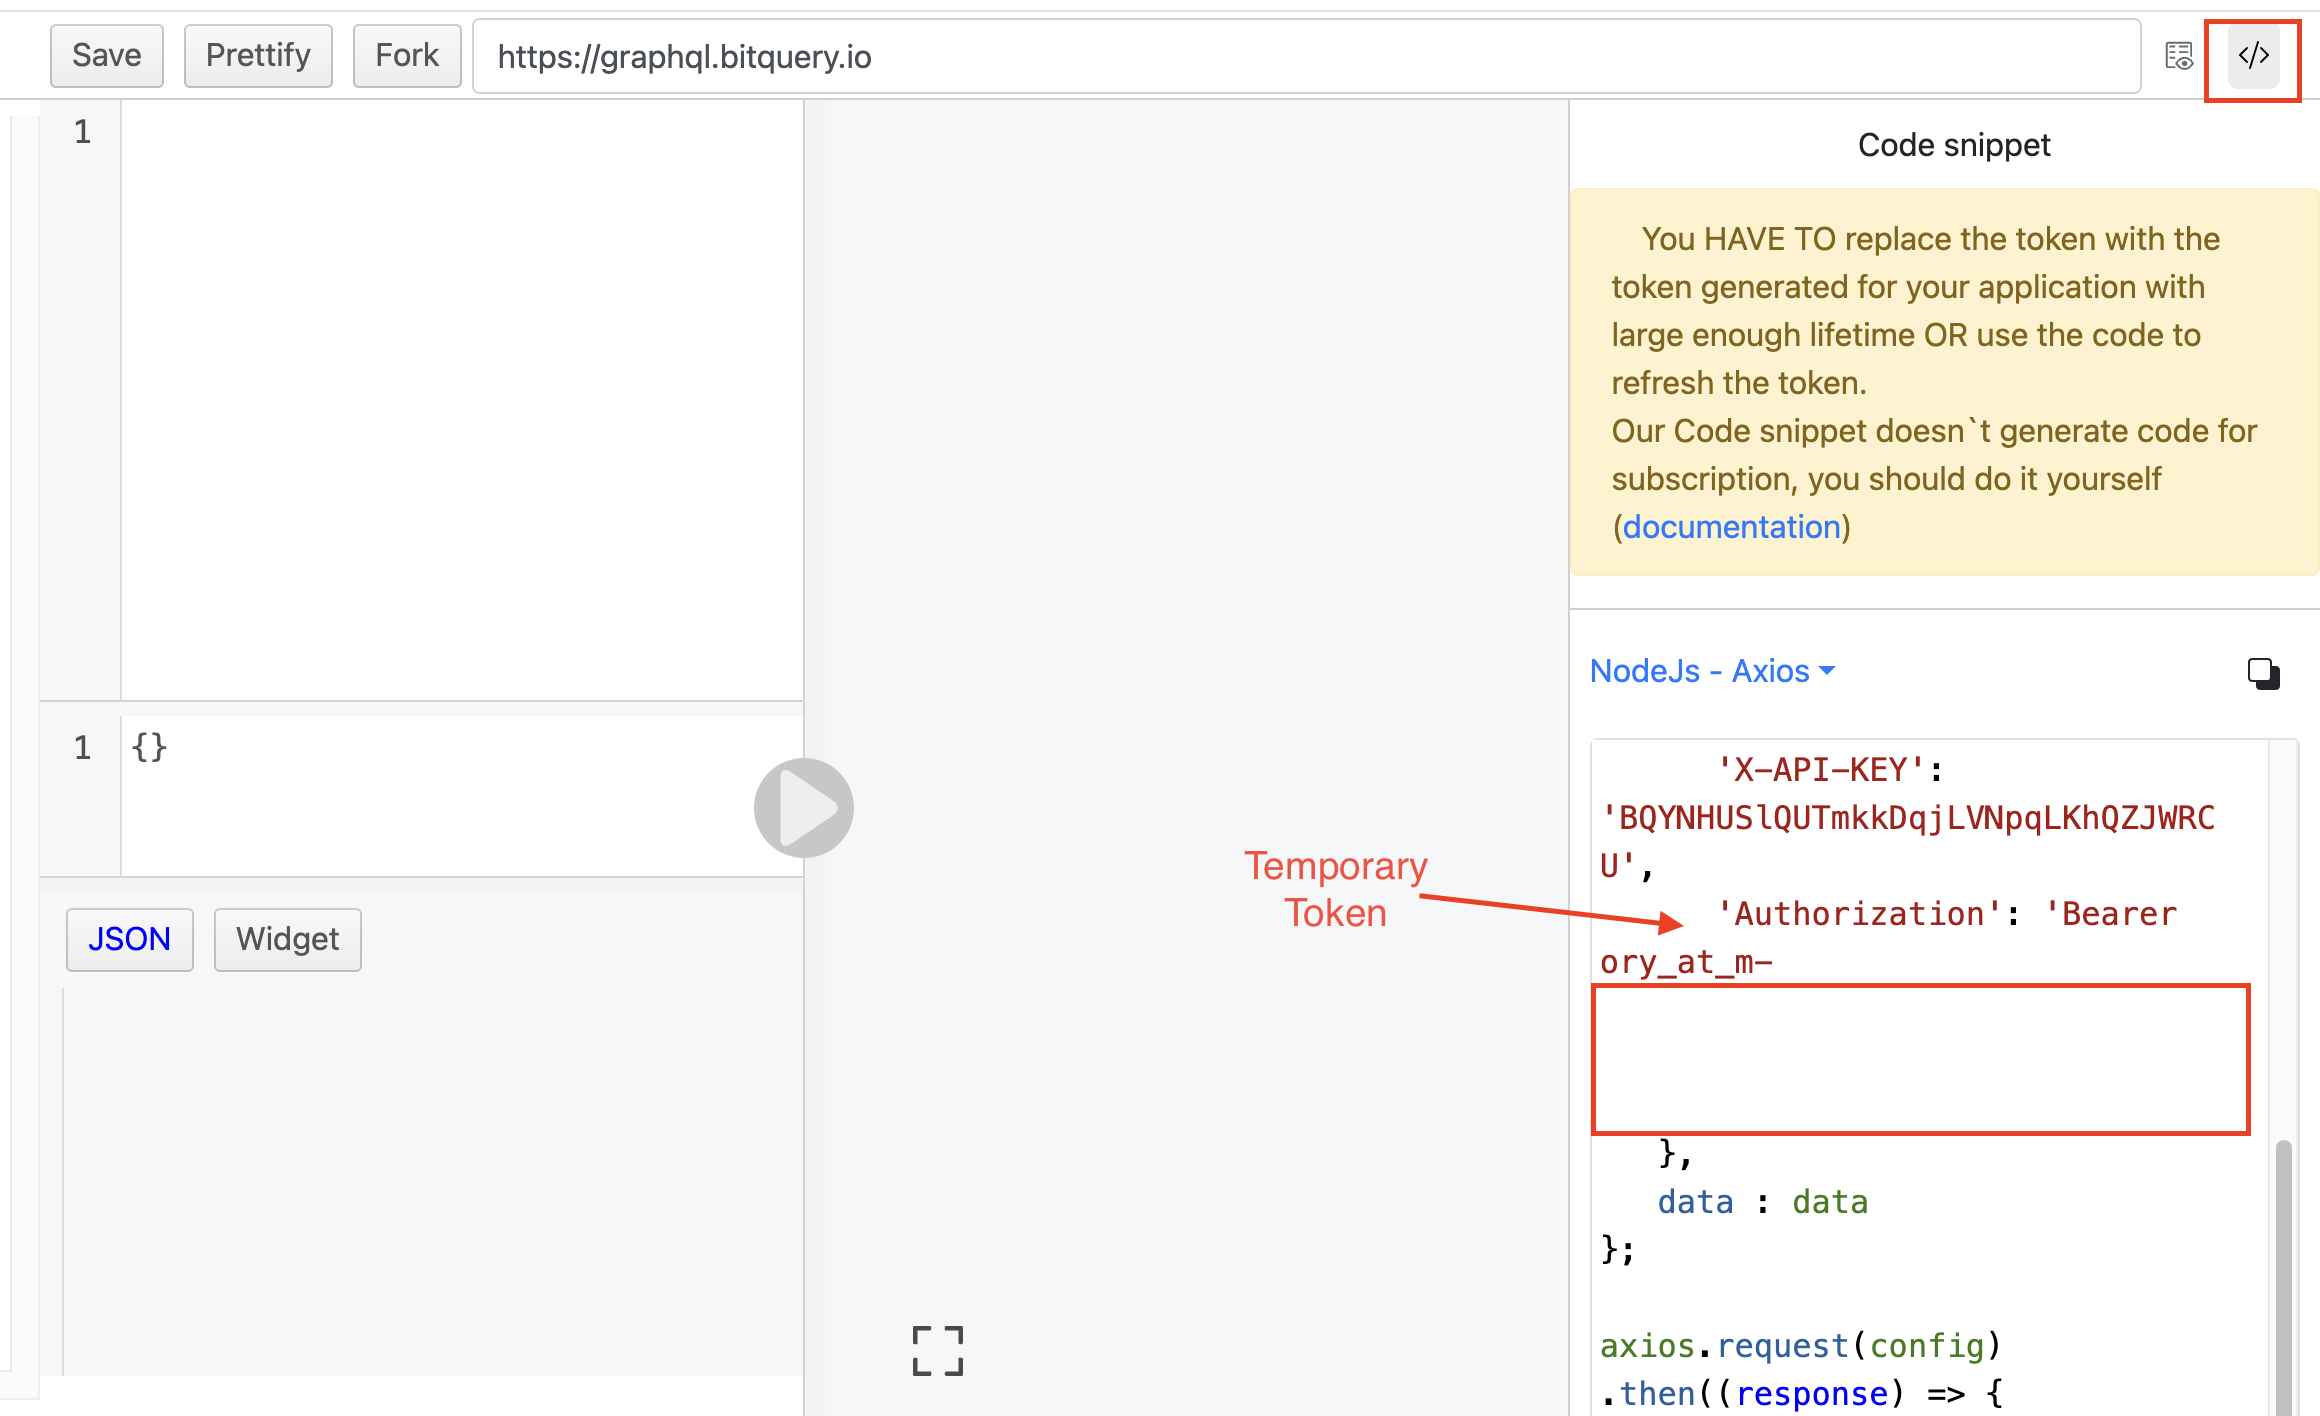
For example, you can include the token in the header as shown below:
Authorization: Bearer <access_token>
Refer Postman examples here
Revoking an Access Token
If you believe that your access token has been compromised, open Authorization → Applications and click Revoke on the row for that application (some rows also link to Tokens for that app).
Generating a Token Programmatically
Remember that this approach requires more effort to implement. It is suitable for applications with a high risk of token theft or misuse. This approach expects you to programmatically generate an access token using your client ID and client secret of an application.

Using curl
Replace YOUR_CLIENT_ID and YOUR_CLIENT_SECRET with your application's client ID and client secret:
curl -X POST "https://oauth2.bitquery.io/oauth2/token" \
  -H "Content-Type: application/x-www-form-urlencoded" \
  --data-urlencode "grant_type=client_credentials" \
  --data-urlencode "client_id=YOUR_CLIENT_ID" \
  --data-urlencode "client_secret=YOUR_CLIENT_SECRET" \
  --data-urlencode "scope=api"
Using Python
Below is a code snippet in Python that shows you how to programmatically generate a token and use the API, replace the placeholders with actual information.
Ensure that scope=api is mentioned in the payload,
import requests
import json


def oAuth_example():

  url = "https://oauth2.bitquery.io/oauth2/token"

  payload = 'grant_type=client_credentials&client_id=YOUR_ID_HERE&client_secret=YOUR_SECRET_HERE&scope=api'

  headers = {'Content-Type': 'application/x-www-form-urlencoded'}

  response = requests.request("POST", url, headers=headers, data=payload)
  resp = json.loads(response.text)
  print(resp)
  access_token=resp['access_token']

  url_graphql = "https://streaming.bitquery.io/graphql"
  headers_graphql = {
      'Content-Type': 'application/json',
      'Authorization': f'Bearer {access_token}'
  }

  //use the token to send a request


oAuth_example()
The response will include details on scope and expiration time of the token. A sample response looks like this:
{'access_token': 'ory_at_sKK8sSq8', 'expires_in': 2627999, 'scope': 'api', 'token_type': 'bearer'}
Deleting an Application
If you no longer need an application, open Authorization → Applications and remove it using the action shown for that row (for example Delete or Revoke, depending on application type). All tokens for that application will stop working.
Billing Considerations
- Billing remains consistent across API v1 and v2.
- Purchase points once and utilize them for either v1 or v2 in any combination.