Solana Arbitrage Dashboard Project
The following tutorial is a step by step guide to build a Dashboard that displays arbitrage opportunities for WSOL/USDC pair on Solana.
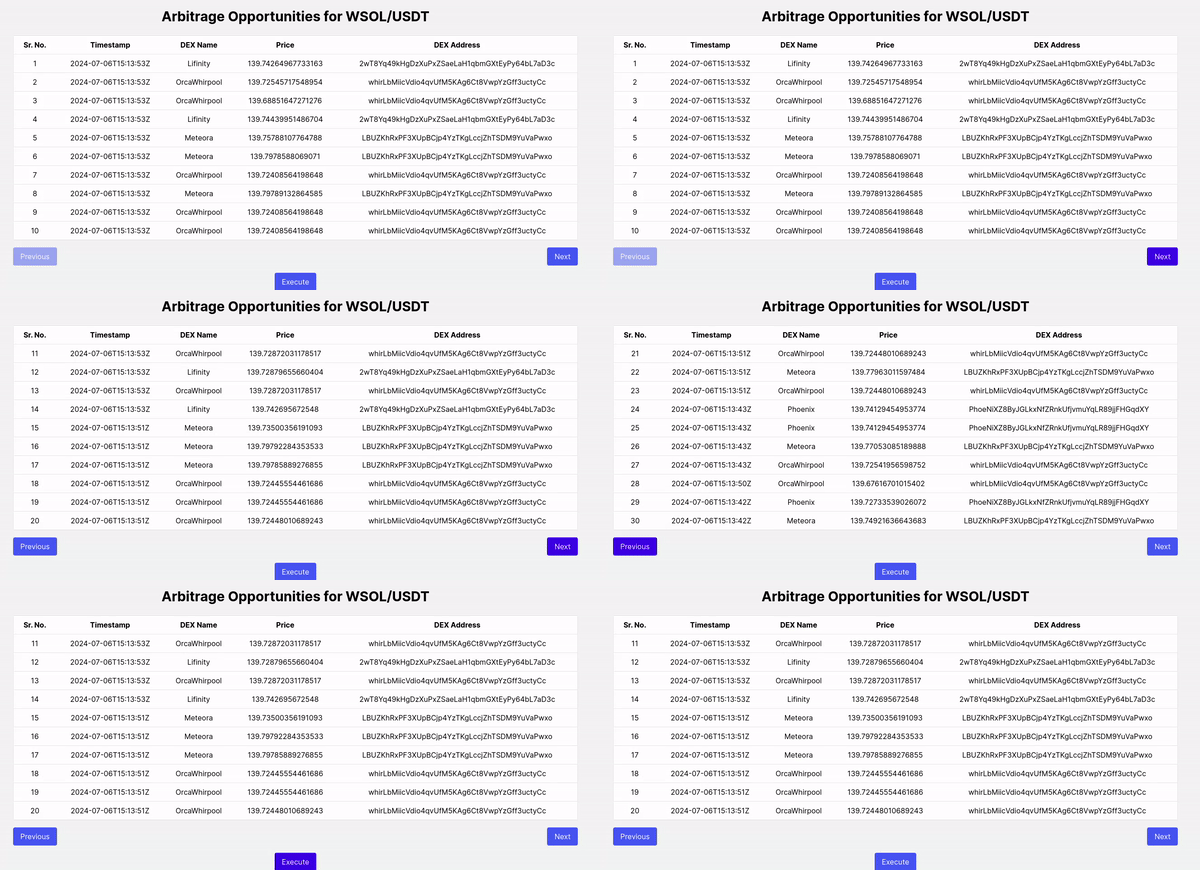
This is how it will look

The app has the following features:
- It displays a table with the DEX Name, Pair exchange rate on the DEX and DEX Address once the data is fetched.
- It handles errors during the data fetching process.
- It has a Execute Button which doesn't implement anything yet, but any PR regarding the same is welcome.
The app uses the following libraries and APIs:
- Next: An optimised version of React for building user interfaces with server-side rendering.
- Axios: A promise-based HTTP client for the browser and Node.js.
- Bitquery GraphQL API: A service that provides access to blockchain data through a GraphQL interface.
To use this code, you need to have the following dependencies installed in your project:
- react
- react-dom
- axios
- tailwind-css
GraphQL query
The following query will be used to fetch the required data for the project.
subscription {
  Solana {
    DEXTrades(
      where: {
        Trade: {
          Buy: {
            Currency: {
              MintAddress: { is: "So11111111111111111111111111111111111111112" }
            }
          }
          Sell: {
            Currency: {
              MintAddress: {
                is: "EPjFWdd5AufqSSqeM2qN1xzybapC8G4wEGGkZwyTDt1v"
              }
            }
          }
        }
      }
    ) {
      Trade {
        Dex {
          ProgramAddress
          ProtocolName
          ProtocolFamily
        }
        Buy {
          PriceInUSD
          Account {
            Address
          }
        }
      }
      Block {
        Time
      }
    }
  }
}
Create App
Create an empty next app with the
npx create-next-app arbitrage-dashboard
command, then select the recomended options and clear the defaults in page.js file.
Data Component
Add a new file named data.js in the app folder and follow the below steps.
Import Statements
import axios from "axios";
Functional Component
const getData = async () => {
  let data = JSON.stringify({
    query:
      'subscription {\n  Solana {\n    DEXTrades(\n      where: {Trade: {Buy: {Currency: {MintAddress: {is: "So11111111111111111111111111111111111111112"}}}, Sell: {Currency: {MintAddress: {is: "EPjFWdd5AufqSSqeM2qN1xzybapC8G4wEGGkZwyTDt1v"}}}}}\n    ) {\n      Trade {\n        Dex {\n          ProgramAddress\n          ProtocolName\n          ProtocolFamily\n        }\n        Buy {\n          PriceInUSD\n          Account {\n            Address\n          }\n        }\n      }\n      Block {\n        Time\n      }\n    }\n  }\n}\n',
    variables: "{}",
  });

  let config = {
    method: "post",
    maxBodyLength: Infinity,
    url: "https://streaming.bitquery.io/graphql",
    headers: {
      "Content-Type": "application/json",
      Authorization: process.env.NEXT_PUBLIC_BITQUERY_TOKEN,
    },
    data: data,
  };

  let response = await axios.request(config);
  //  console.log(JSON.stringify(response.data.data.Solana.DEXTrades))
  return response.data.data.Solana.DEXTrades;
};

export default getData;
Page Component
All the code blocks given below will be added to the page.js file in the app folder.
Import Statements
"use client";

import React, { useState, useEffect } from "react";
import getData from "./data";
Note that the "use client" on the top is essential in order to use useState and useEffect functionalities.
Home Component
const Home = () => {...};: All the code blocks below will be added in place of dots.export default Home;: Export statement for Home Component.
State Management with useState Hook
const [trades, setTrades] = useState([]);: Declares a state variabletradesthat is initially an empty array. Also defines a setter functionsetTradesto update the state value oftrades.const [currentPage, setCurrentPage] = useState(0);: Declares a state variablecurrentPagethat is initially0. Also defines a setter functionsetCurrentPageto update the state value ofcurrentPage.const itemsPerPage = 10;: Sets the number of opportunities displayed on one page as10.
useEffect Hook
useEffect(() => {...}, []);: Defines auseEffecthook that makes an HTTP POST request to the Bitquery API to retrieve data for the arbitrage opportunities on Solana chain.
Pagination Methods
-
const handleNextPage = () => {...};: Defines a methodhandleNextPageto display the next10arbitrage opportunities. -
const handlePrevPage = () => {...};: Defines a methodhandlePrevPageto display the previous10arbitrage opportunities.
Component Render
return (
  <div className="min-h-screen bg-gray-100 flex flex-col items-center justify-center">
    <div className="container mx-auto p-4">
      <h1 className="text-3xl font-bold mb-6 text-center">
        Arbitrage Opportunities for WSOL/USDT
      </h1>
      <div className="overflow-x-auto mb-4">
        <table className="min-w-full bg-white border border-gray-200">
          <thead>
            <tr>
              <th className="py-2 px-4 border-b">Sr. No.</th>
              <th className="py-2 px-4 border-b">Timestamp</th>
              <th className="py-2 px-4 border-b">DEX Name</th>
              <th className="py-2 px-4 border-b">Price</th>
              <th className="py-2 px-4 border-b">DEX Address</th>
            </tr>
          </thead>
          <tbody>
            {currentTrades.map((trade, index) => (
              <tr key={index} className="text-center">
                <td className="py-2 px-4 border-b">
                  {index + 1 + currentPage * itemsPerPage}
                </td>
                <td className="py-2 px-4 border-b">{trade.Block.Time}</td>
                <td className="py-2 px-4 border-b">
                  {trade.Trade.Dex.ProtocolFamily}
                </td>
                <td className="py-2 px-4 border-b">
                  {trade.Trade.Buy.PriceInUSD}
                </td>
                <td className="py-2 px-4 border-b">
                  {trade.Trade.Dex.ProgramAddress}
                </td>
              </tr>
            ))}
          </tbody>
        </table>
      </div>
      <div className="flex justify-between w-full">
        <button
          onClick={handlePrevPage}
          disabled={currentPage === 0}
          className={`bg-blue-500 text-white px-4 py-2 rounded ${
            currentPage === 0
              ? "opacity-50 cursor-not-allowed"
              : "hover:bg-blue-600"
          }`}
        >
          Previous
        </button>
        <button
          onClick={handleNextPage}
          disabled={currentPage >= Math.floor(trades.length / itemsPerPage)}
          className={`bg-blue-500 text-white px-4 py-2 rounded ${
            currentPage >= Math.floor(trades.length / itemsPerPage)
              ? "opacity-50 cursor-not-allowed"
              : "hover:bg-blue-600"
          }`}
        >
          Next
        </button>
      </div>
    </div>
    <button className="bg-blue-500 text-white px-4 py-2 rounded hover:bg-blue-600">
      {" "}
      Execute{" "}
    </button>
  </div>
);
CSS Styling
The app uses Tailwind CSS for styling which is much more effecient and easy to use.