How to Build Multichain Portfolio Tracker
In this tutorial, we'll walk through building a dashboard to track balances across multiple Ethereum Virtual Machine (EVM) compatible blockchains using Streamlit. We'll utilize the Bitquery API to retrieve wallet balance data from various chains.
Step 1: Install and Import Libraries
Before we begin, make sure you have Python installed on your system. We'll need to install the following libraries:
- Streamlit: A Python library for building interactive web applications.
- Requests: A library for making HTTP requests in Python.
You can install these libraries using pip:
pip install streamlit requests
Once installed, import the necessary libraries at the beginning of your Python script:
import streamlit as st
import requests
Step 2: Querying Data from Bitquery API
We'll use the Bitquery API to retrieve wallet balance data from various EVM-compatible blockchains.
The headers dictionary is created to specify the content type of the request as JSON and to include the API key for authentication in the request headers when making API calls to Bitquery.
BITQUERY_API_URL = "https://graphql.bitquery.io/"
BITQUERY_API_KEY = "<YOUR_BITQUERY_API_KEY>"

headers = {
'Content-Type': 'application/json',
'X-API-KEY': BITQUERY_API_KEY
}

In our case, we're interested in Ethereum, Binance Smart Chain (BSC), Cronos, Celo, Matic, Moonbeam, Fantom, Avalanche, and Klaytn. We define a function get_cross_chain_data(address) to query balance data for a given wallet address across multiple chains using GraphQL.

def get_cross_chain_data(address):
query = """
query ($address: String!) {
  ethereum: ethereum {
    address(address: {is: $address}) {
      balances {
        value
        usdValue: value(in: USD)
        currency {
          address
          symbol
          tokenType
        }
      }
    }
  }
  bsc: ethereum(network: bsc) {
    address(address: {is: $address}) {
      balances {
        value
        usdValue: value(in: USD)
        currency {
          address
          symbol
          tokenType
        }
      }
    }
  }
  cronos: ethereum(network: cronos) {
    address(address: {is: $address}) {
      balances {
        value
        usdValue: value(in: USD)
        currency {
          address
          symbol
          tokenType
        }
      }
    }
  }
  celo: ethereum(network: celo_mainnet) {
    address(address: {is: $address}) {
      balances {
        value
        usdValue: value(in: USD)
        currency {
          address
          symbol
          tokenType
        }
      }
    }
  }
  matic: ethereum(network: matic) {
    address(address: {is: $address}) {
      balances {
        value
        usdValue: value(in: USD)
        currency {
          address
          symbol
          tokenType
        }
      }
    }
  }
  moonbeam: ethereum(network: moonbeam) {
    address(address: {is: $address}) {
      balances {
        value
        usdValue: value(in: USD)
        currency {
          address
          symbol
          tokenType
        }
      }
    }
  }
  fantom: ethereum(network: fantom) {
    address(address: {is: $address}) {
      balances {
        value
        usdValue: value(in: USD)
        currency {
          address
          symbol
          tokenType
        }
      }
    }
  }
  avalanche: ethereum(network: avalanche) {
    address(address: {is: $address}) {
      balances {
        value
        usdValue: value(in: USD)
        currency {
          address
          symbol
          tokenType
        }
      }
    }
  }
  klaytn: ethereum(network: klaytn) {
    address(address: {is: $address}) {
      balances {
        value
        usdValue: value(in: USD)
        currency {
          address
          symbol
          tokenType
        }
      }
    }
  }
}

"""
variables = {
"address": address,
}

response = requests.post(BITQUERY_API_URL, json={"query": query, "variables": variables}, headers=headers)
return response.json()
Step 3: Building the Streamlit Dashboard and Table
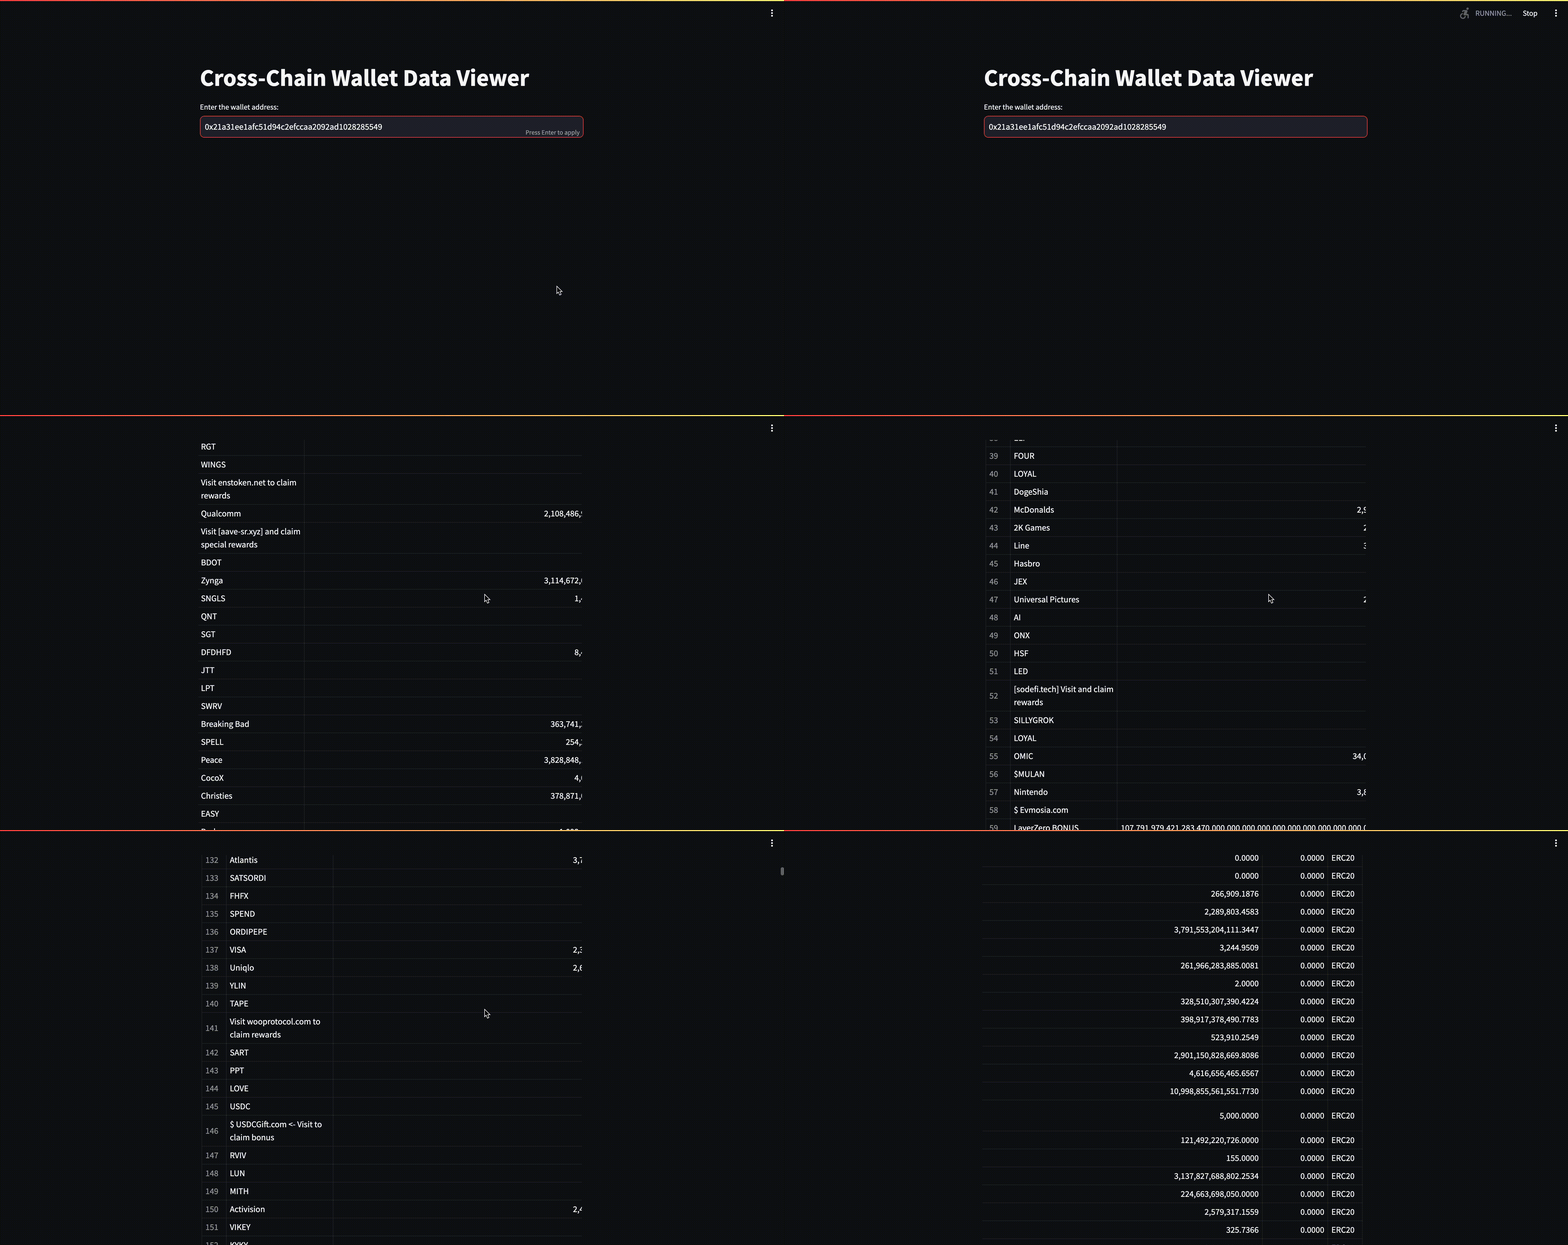
We'll use Streamlit to create a simple web application for our dashboard. The user will input their wallet address, and the dashboard will display their balances across different chains.
We define a function main() that serves as the entry point to our Streamlit application. Within this function, we create a title for our dashboard using st.title(), and provide a text input field for the user to enter their wallet address using st.text_input().
Upon user input, we call the get_cross_chain_data(address) function to retrieve balance data for the provided wallet address. We then parse the response and extract balance information for each token across different chains.
Finally, we create a list of dictionaries containing token data and display it in a table using st.table().
Below is the code for building the streamlit table:
def main():
    st.title("Cross-Chain Wallet Data Viewer")

    user_address = st.text_input("Enter the wallet address:")
    if user_address:
    result = get_cross_chain_data(user_address)

    if 'data' in result:
    ethereum_data = result['data']['ethereum']['address']
Extracting balances information
balances_data = ethereum_data[0]['balances'] if ethereum_data else []

# Creating a list of dictionaries for each token

token_data_list = []
for token_info in balances_data:
token_data = {
'Symbol': token_info['currency']['symbol'],
'Balance': token_info['value'],
'USD Value': token_info['usdValue'],
'Token Type': token_info['currency']['tokenType'],
}
token_data_list.append(token_data)

# Displaying the table

st.table(token_data_list)

if **name** == "**main**":
main()
Step 4: Output
Once the user runs the script, Streamlit will launch a local web server, and the dashboard will be accessible via a web browser. Users can input their wallet address, and the dashboard will dynamically fetch and display their balance information across multiple EVM-compatible chains.
That's it! You've successfully built a Multichain EVM DeFi Portfolio Tracker using Streamlit and the Bitquery API. Feel free to customize the dashboard further to suit your needs or add additional features as per your requirements.